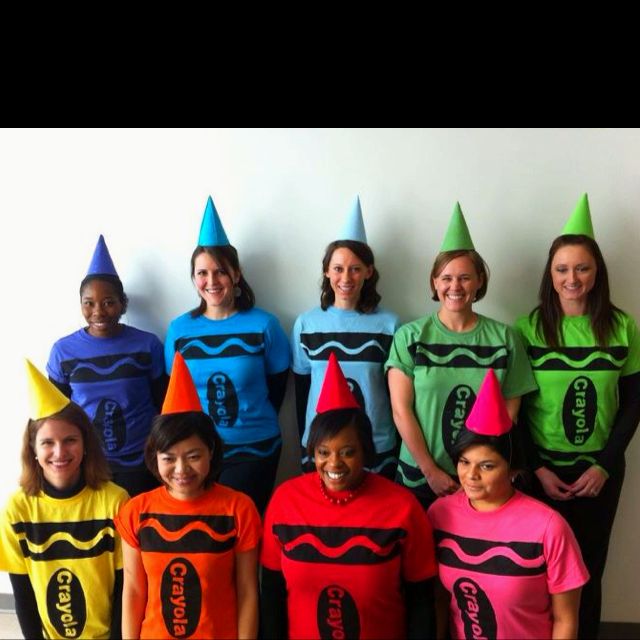
Want to add a splash of color to your next costume party? Look no further than a crayon costume. This vibrant and playful outfit is perfect for Halloween, themed parties, or any occasion where you want to stand out. Let’s dive into the steps to create your own one-of-a-kind crayon costume.
Gathering Your Supplies
Before you start crafting, make sure you have the following materials:
- Cardboard: For the main body of the crayon.
- Paint or colored paper: To match the color of your desired crayon.
- Scissors: For cutting the cardboard and other materials.
- Hot glue gun and glue sticks: To secure the pieces together.
- Elastic: To hold the costume in place.
- Optional: Glitter, sequins, or other decorations to personalize your crayon.
Creating the Crayon Body
- Cut the cardboard: Start by cutting two rectangular pieces of cardboard for the front and back of the crayon. The length and width will depend on your desired size.
- Shape the cardboard: Round the top edges of both pieces to create the pointed tip of the crayon.
- Join the pieces: Use hot glue to attach the front and back pieces together, leaving an opening at the bottom for your legs.
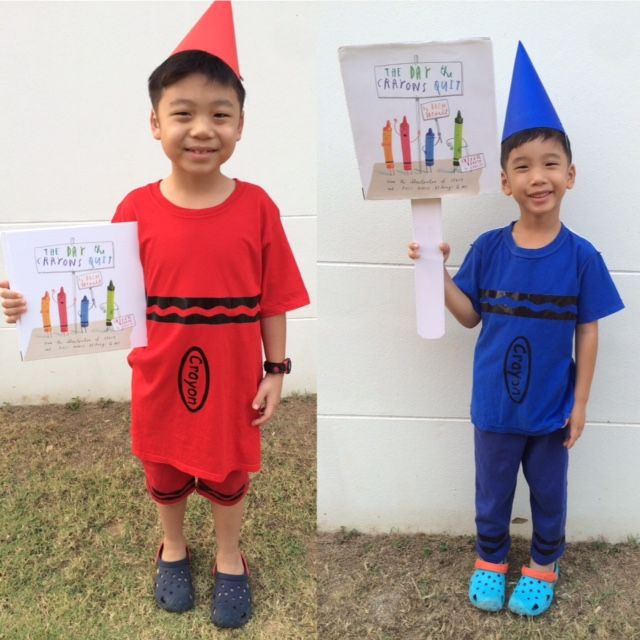
Adding Color
- Paint or use colored paper: Choose the color that matches your desired crayon. You can paint the cardboard directly or use colored paper to cover it.
- Decorate: Add any additional decorations like glitter, sequins, or stickers to personalize your crayon.
Creating the Crayon Point
- Cut a triangle: From a piece of cardboard, cut a triangle that is slightly larger than the pointed tip of your crayon.
- Attach the triangle: Use hot glue to secure the triangle to the top of the crayon body.
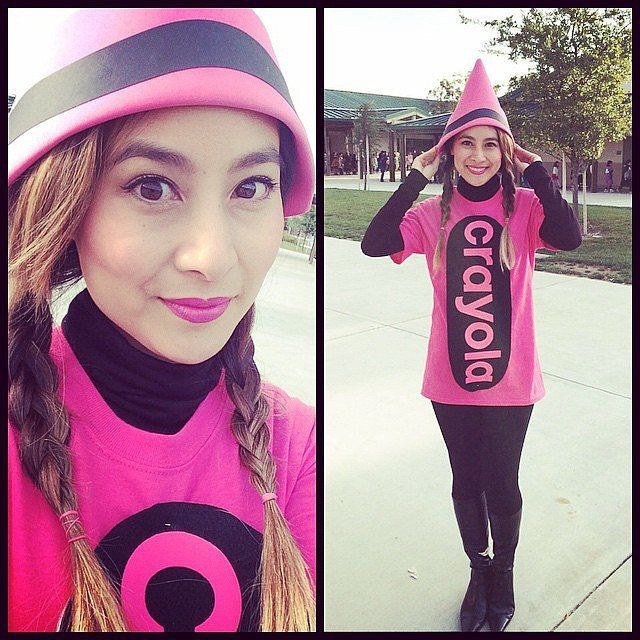
Instructions for making the pointed top of the crayon out of cardboard
Instructions:
- Draw a template: On a piece of cardboard, draw a large triangle. The base of the triangle should be slightly wider than the top of your crayon body.
- Cut out the triangle: Carefully cut out the triangle along the lines you drew.
- Round the edges: Round the edges of the triangle, especially the base, to create a more realistic crayon shape.
- Attach the point: Use hot glue to attach the base of the triangle to the top of your crayon body. Make sure the point is centered and securely attached.
Optional:
- Add layers: For a more sturdy and defined point, cut out multiple triangles and layer them on top of each other.
- Paint or decorate: You can paint or decorate the point to match the color of your crayon or add details like a label or a small circle to represent the tip.
By following these instructions, you can create a realistic and eye-catching pointed top for your crayon costume.
Making the Straps
- Measure and cut: Measure the distance from your shoulders to the bottom of the crayon body. Cut two pieces of elastic to that length.
- Attach the straps: Attach one end of each elastic strap to the top of the crayon body, near the point. Secure the other end to the back of the crayon body, near the bottom.
Suggestions for securing the hat to the rest of the costume
Here are a few suggestions for securing the hat to your crayon costume:
Hot Glue:
- Attach the hat: Place the hat on top of the crayon body and use hot glue to secure it in place.
- Reinforcement: For added stability, apply hot glue along the edges of the hat and the crayon body.
Elastic Straps:
- Create straps: Cut two pieces of elastic and attach them to the inside of the hat and the top of the crayon body.
- Adjust the straps: Adjust the straps to ensure a secure fit and prevent the hat from slipping.
Safety Pins:
- Pin the hat: Attach the hat to the crayon body using safety pins. You can pin through the fabric or material of both pieces.
Velcro Strips:
- Attach strips: Attach a Velcro strip to the inside of the hat and another to the top of the crayon body.
- Secure the hat: Press the Velcro strips together to secure the hat in place.
Hairspray:
- Temporary hold: If you’re only wearing the costume for a short time, you can use hairspray to temporarily hold the hat in place.
Choose the method that best suits your costume and your comfort level. Experiment with different techniques to find the one that works best for you.
Putting on Your Crayon Costume
- Step into the costume: Slide your legs into the opening at the bottom of the crayon body.
- Adjust the straps: Adjust the straps to ensure a comfortable fit.
Additional details
Materials:
- Foam board: For a sturdier and more durable crayon body.
- Acrylic paint: For a more vibrant and long-lasting color.
- Fabric markers: For adding details or patterns to your costume.
- Hot glue gun and glue sticks: For attaching the pieces together.
- Elastic: For the straps and any other adjustments.
- Safety pins: For securing the costume in place.
- Optional: Glitter, sequins, or other decorations to personalize your crayon.
Construction:
- Crayon body: If using foam board, cut two rectangular pieces and shape them as described in the previous guide. You can also use a cardboard box and cut it to size.
- Crayon point: For a more realistic point, use a cone-shaped piece of foam board or cardboard.
- Straps: You can use fabric straps instead of elastic for a more durable and adjustable fit.
- Finishing touches: Add details like a crayon label, a colored tip, or a crayon-shaped belt buckle.
Tips:
- Measure carefully: Ensure that the crayon body is the right size for you before cutting the cardboard or foam board.
- Use a template: If you’re not confident in your cutting skills, draw a template on paper first.
- Test the fit: Try on the costume as you go to make sure it fits comfortably.
- Consider the weather: If you’re wearing the costume outdoors, choose materials that are suitable for the weather conditions.
- Have fun! The most important thing is to enjoy the process of creating your crayon costume.
By incorporating these additional details, you can create a truly unique and impressive crayon costume that will be the talk of the party.
Tips for a Successful Crayon Costume
- Consider your height: Adjust the length of the crayon body to fit your height.
- Add details: Include small details like a crayon label or a colored tip to enhance your costume.
- Stay comfortable: Make sure the straps are not too tight and that you can move freely in the costume.
- Have fun! Enjoy wearing your colorful and creative crayon costume.
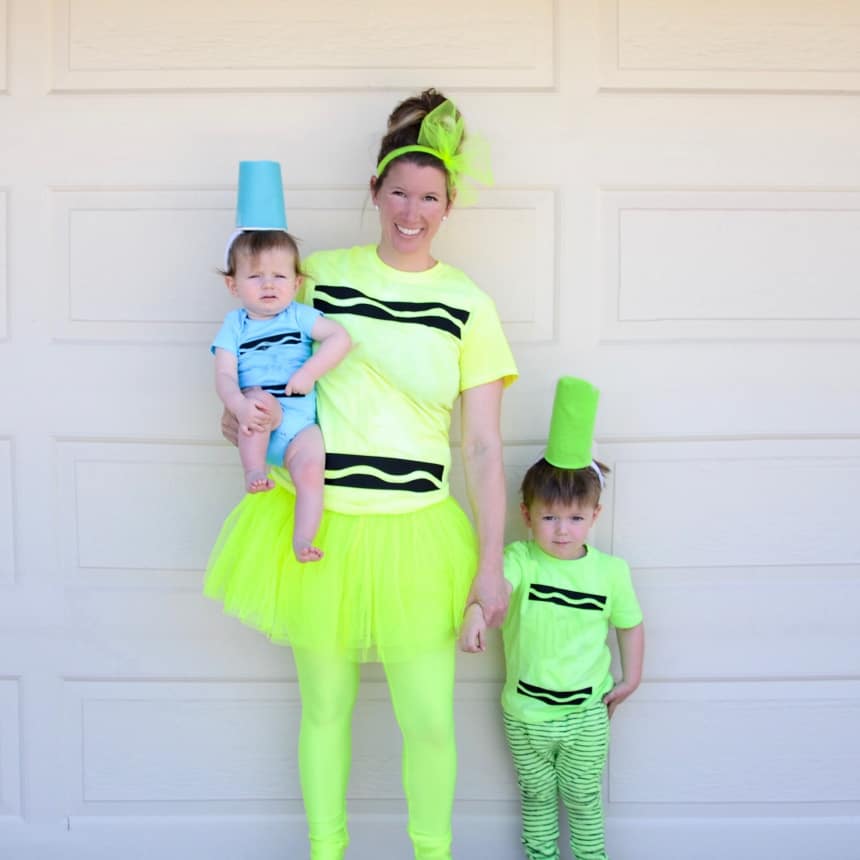
Ideas for adding finishing touches, such as a “crayon” logo
To complete your crayon costume, consider adding these finishing touches:
Crayon Logo
- Create a logo: Design a simple crayon logo using markers or paint. You can include the word “crayon” or a small crayon shape.
- Attach the logo: Glue or pin the logo to the front of your costume, near the top.
Coordinating Shirt and Pants
- Choose colors: Select a shirt and pants that complement the color of your crayon costume. For example, if your crayon is red, you could wear a red shirt and white pants.
- Add details: Consider adding crayon-shaped buttons or patches to your shirt or pants.
Accessories
- Hat: Wear a hat in the same color as your crayon.
- Shoes: Choose shoes that match the color of your costume or wear white sneakers for a classic look.
- Makeup: Apply face paint or makeup to match the color of your crayon.
Props
- Crayon box: Carry a small, empty crayon box as a prop.
- Crayon shavings: Scatter crayon shavings around your feet to create a colorful effect.
By incorporating these finishing touches, you can elevate your crayon costume and make it truly unique.
With a little creativity and effort, you can create a fun and memorable crayon costume. By following these steps and using your imagination, you’ll be sure to stand out at any party or event. So, grab your supplies and get ready to color your world with your homemade crayon costume!