Introduction
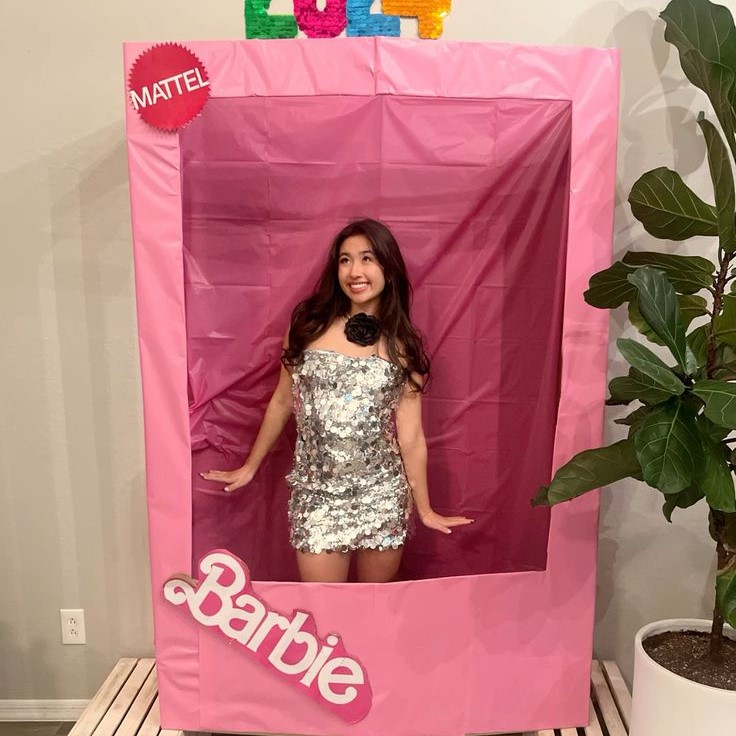
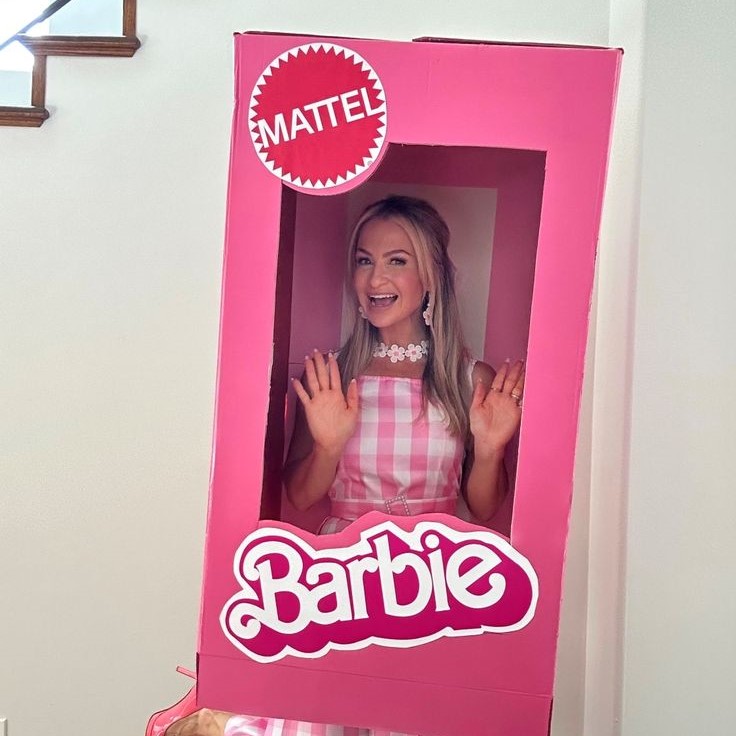
Welcome to a fantastic journey into the world of DIY costumes! If you’re searching for a unique and eye-catching idea for Halloween, look no further. Today, we’re diving into ‘how to make a Barbie box costume’, a creative endeavor that promises fun and a bit of nostalgia. This blog will guide you through each step, offering tips and tricks to craft an impressive life-size Barbie box, perfect for parties, costume contests, or simply for the joy of making something truly special. We’ll explore how to find the perfect dress, build a sturdy box, and give it the shimmering finish it deserves. So, grab your glue gun, get ready to thrift shop, and let’s start this DIY adventure together!

Finding the Perfect Dress
Every Barbie needs her signature dress! Start your costume with a thrift store treasure hunt. These shops are gold mines for affordable, unique finds.
Thrift Store Treasure Hunt
Hunting for the perfect dress may seem daunting, but thrift stores are your best ally. With patience and a keen eye, you can unearth a gem for your Barbie box costume. Look for a dress that matches Barbie’s iconic style – think bright colors, bold designs, and that classic flair. Remember, the price is right at thrift stores – you might snag a deal as sweet as $4!
Temporary Alterations for Effect
Once you’ve found your dress, you may need to tweak it to nail the Barbie look. No need for drastic changes or sewing skills; opt for temporary alterations to keep the dress intact. Tuck straps into a strapless bra for a sleek silhouette. Use simple hand stitches to attach any additional accents, like floral fabric, to emulate Barbie’s style. These quick fixes ensure your dress will transform into an amazing costume, without ruining it for future wear.
Creating the Life-Size Doll Box
Now that your perfect Barbie dress is at hand, it’s time to create your very own life-size doll box.
Gathering Materials from the Dollar Tree
Begin by visiting your local Dollar Tree or any other dollar store to gather materials. You’ll need poster boards – around 19 should do the trick. While there, pick up a box cutter or scissors, a hot glue gun, and consider gold spray paint for later steps.
Construction Steps
Constructing the box is straightforward but requires precision. Start by cutting the poster boards to size – you’ll need seven for the back panel, ten for the sides, and two for the top. Arrange the boards and use the hot glue gun to securely join them together. Remember, keeping the edges neat is key for an authentic Barbie box look.
Reinforcing the Structure
To ensure your Barbie box can withstand a night of fun, reinforce the structure. Double-layer the poster boards for added sturdiness. For extra support, consider using additional cardboard pieces along the seams and corners. You want your box to be both impressive and durable!
Adding the Finishing Touches
Once your life-size doll box is built, it’s time to make it shine. True to the Barbie brand, gold elements are key to authenticity. With some simple additions, you can elevate your costume from homemade to standout masterpiece.
Gold Spray Paint for Authenticity
A pop of gold can transform your Barbie box into a realistic toy package. Take your constructed box to a well-ventilated area. It could be outdoors or a space with open windows. Shake your can of gold spray paint and apply an even coat all over the box. Allow it to dry completely. It’s wise to do multiple light coats rather than one heavy one, to avoid drips. Don’t forget to spray the edges and the inside flaps for a thorough finish. The gold color brings your costume closer to what one would find in a toy store.

Dressing Up the Barbie Doll
For the ‘doll’ part of your costume – you! – attention to detail is crucial. After securing the dress, add the final touches. A tiara, sparkly jewelry, and perhaps a neat hairstyle will complete your Barbie look. If you’re including a miniature Barbie, dress her up too. Use scrap fabric cut to scale for her dress. Match it to your own, and glue or stitch it on. For added effect, mimic the pose of a Barbie in its packaging. Smile and hold still as if you’re the plastic icon herself.
Assembling the Barbie Box Costume
With your dress impeccably tailored and your life-size doll box sturdily built, it’s now time to assemble your Barbie box costume. This final phase requires a keen sense of spatial awareness and an eye for practicality to ensure your costume is not only visually appealing but also stable enough to move around in.
Placement and Stability Tips
Positioning your box correctly is vital for both comfort and effect. Choose an area with plenty of space to avoid cramped conditions. When stepping into the box, make sure the opening is wide enough for you. It should sit comfortably around your waist without hindering movement. For stability, secure the box around your hips using a belt or a strong piece of elastic. This will keep the box from shifting as you walk.
To stay upright and keep the box’s shape, you can include shoulder straps inside. These straps, hidden from view, should be made from sturdy material, like nylon, and adjustable to match your height. Lastly, use double-sided tape or velcro strips to attach any loose edges or flaps of the costume to your dress. This helps avoid accidents and maintains a sleek, seamless appearance resembling a genuine Barbie in the box.
Now that you have added the final structural touches, your Barbie box costume is ready to be shown off. It’s time to think about how to best display your DIY creation and take it to the next level by planning your grand showcase.
Showcasing Your DIY Barbie Box
You’ve put in hard work, and now it’s time to showcase your costume creation. Think about how to make a big impact with your Barbie box.
Photo Opportunities and Display Tips
Your DIY Barbie box is not just a costume; it’s a photo-ready piece of art. Think about lighting, background, and your best Barbie pose to make photos pop. Indoors, pick a spot with enough space and good light. Use a plain wall as a backdrop for a clean and focus-on-you photo. Outside, look for fun spots like a park bench or garden.
Get friends or family to take multiple shots. Try different angles and poses to capture your best look. Remember to keep your face visible and well-lit. If going solo, set up a tripod and use your camera’s timer feature.
For display, ensure your box can stand independently. If it can’t, use a clear stand or prop it against a wall without blocking the front view. Show your box at a Halloween party or a costume contest for real wow moments. Stand inside and strike a pose now and then, but also allow people to admire your work up close.

Sharing on social media? Use hashtags like #BarbieBoxDIY and tag DIY or costume accounts to get more views. Your handmade creation deserves all the likes and comments it can get!
Conclusion and Inspiration
Wrapping up your DIY Barbie box costume journey is a feeling of triumph and joy. You’ve crafted something amazing, a nostalgic tribute with your unique touch. Reflect upon the steps you took from the thrift store quest to the final showcase. Each snip, stitch, and spray added to your masterpiece.
Looking for more creative costume ideas? Let this project inspire you. The skills learned can apply to other themes. Imagine building a race car box or a rocket ship costume using similar techniques. The role of creativity in costume making is limitless.
Remember to share your DIY success. Post pictures and stories online. Inspire others with your experience and enthusiasm. Your handmade costume demonstrates what’s possible with a little imagination and effort.
Finally, take pride in this accomplishment. Next Halloween, you’ll have an even grander idea, all thanks to the time spent on this unique Barbie box costume. Happy crafting and happy Halloween!


