A maid costume is a timeless classic that’s perfect for Halloween, cosplay events, or simply for a fun dress-up party. Whether you’re aiming for a vintage, cute, or sexy look, this guide will walk you through the steps to create your own custom maid costume.
Choosing Your Maid Aesthetic
The first step is to decide on the type of maid you want to be. Here are some popular options:
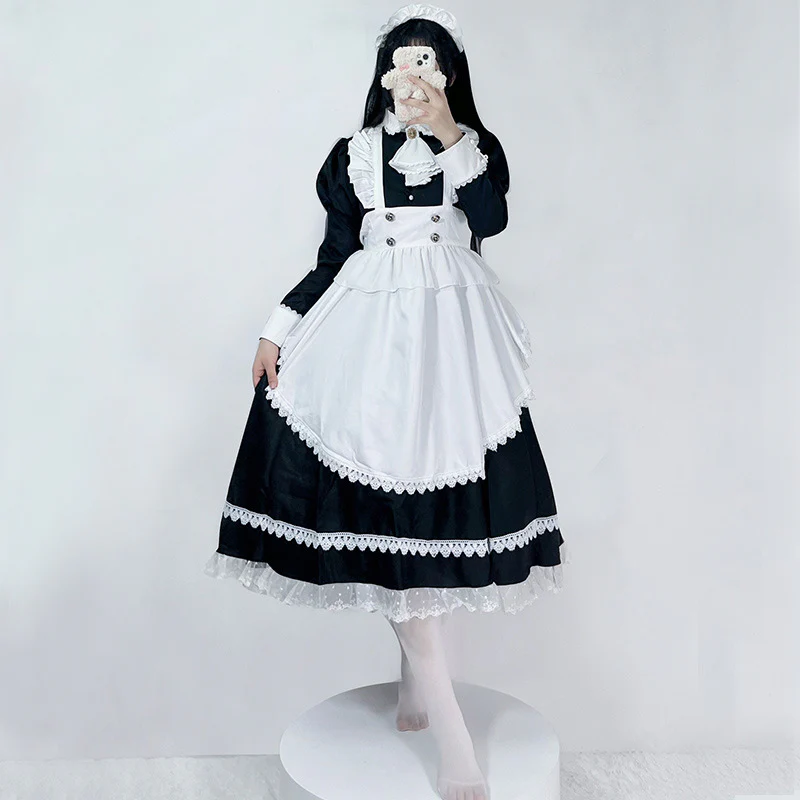
- Vintage Maid: This look features a long, flowing dress, a white apron, and a cap.
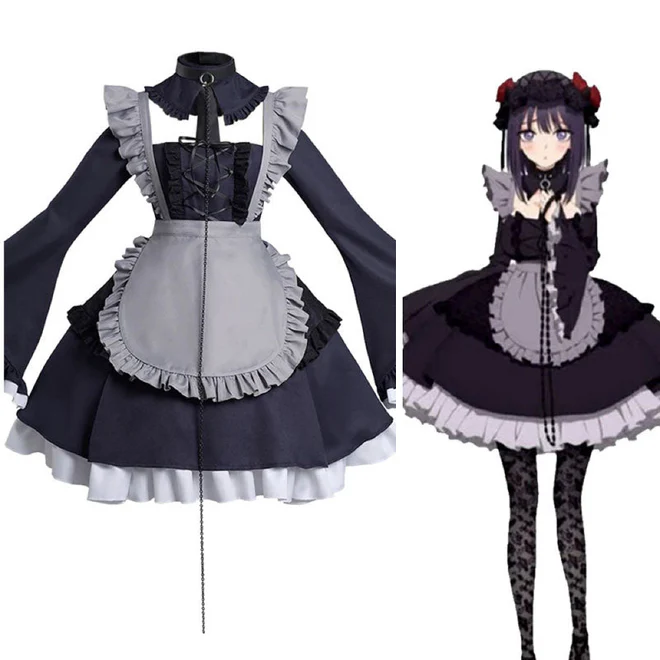
- French Maid: A sexy and sophisticated look featuring a short skirt, a fitted bodice, and a headdress.
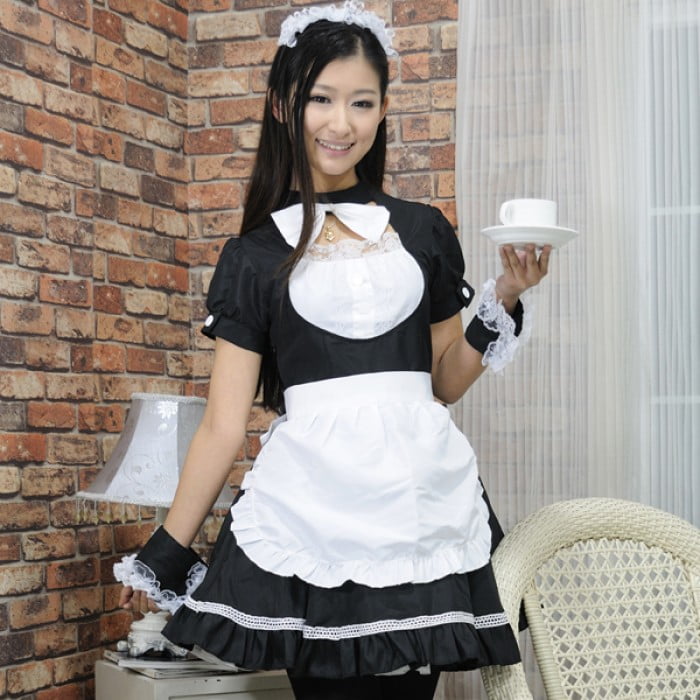
- Japanese Maid: A cute and kawaii style with a long, flowing skirt, a frilly apron, and a headband.
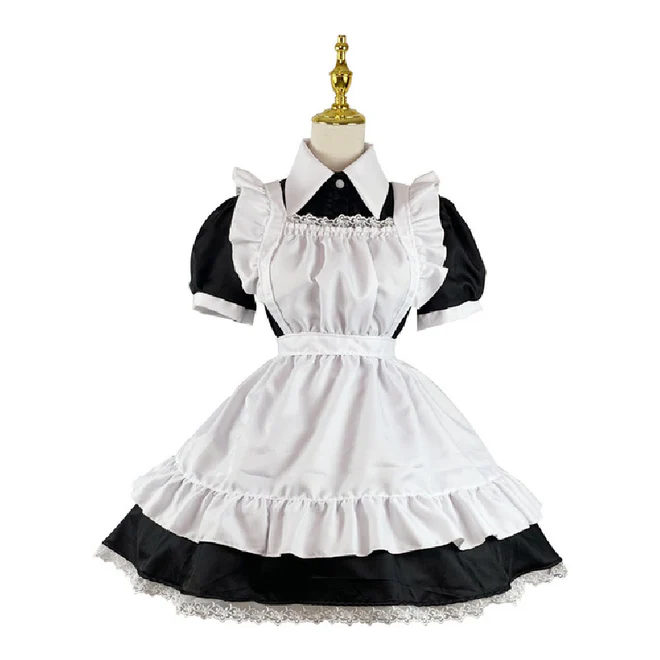
- Modern Maid: A contemporary take on the maid costume, often featuring a shorter skirt, a fitted bodice, and a more casual overall look.
Gathering Your Materials
Once you’ve decided on your aesthetic, gather the following materials:
- Dress: You can purchase a pre-made maid dress, or you can create your own using a pattern or by adapting a simple dress pattern.
- Apron: A white apron is a staple of most maid costumes. You can purchase a pre-made apron or make your own using fabric and elastic.
- Headwear: Depending on your chosen aesthetic, you may need a cap, headdress, or headband.
- Accessories: Consider adding accessories like a collar, cuffs, or a petticoat to complete your look.
Creating Your Dress
If you’re making your own dress, follow these steps:
- Choose a pattern: Select a pattern that matches your desired style. If you’re new to sewing, consider starting with a simple pattern like a basic A-line dress.
- Cut the fabric: Cut the fabric according to the pattern pieces.
- Sew the pieces together: Follow the pattern instructions to sew the pieces together.
- Add details: Add any necessary details, such as lace, ribbons, or buttons.
Making Your Apron
Here’s how to make a simple apron:
- Cut the fabric: Cut a rectangular piece of fabric for the apron body and two smaller pieces for the straps.
- Hem the edges: Hem the edges of the apron body and straps.
- Attach the straps: Attach the straps to the top of the apron body.
Creating Your Headwear
The type of headwear you’ll need will depend on your chosen aesthetic. Here are some ideas:
- Cap: For a vintage maid look, you can make a simple cap using fabric and elastic.
- Headdress: For a French maid look, you can create a headdress using wire, fabric, and feathers.
- Headband: For a more casual look, you can use a simple headband adorned with ribbons or flowers.
Accessorizing Your Costume
Accessories can help to complete your maid costume. Consider adding:
- Collar: A lace or ruffled collar can add a touch of elegance to your look.
- Cuffs: Matching cuffs can complement your collar and add a finishing touch to your sleeves.
- Petticoat: A petticoat can add volume to your skirt and create a more dramatic silhouette.
Tips for Styling Your Maid Costume
- Choose the right fabrics: Opt for fabrics that are comfortable and easy to care for.
- Pay attention to fit: Ensure that your dress and apron fit properly.
- Accessorize wisely: Choose accessories that complement your overall look.
- Have fun! The most important thing is to enjoy the process of creating your maid costume.
Materials needed
For the Dress:
- Fabric: Choose a fabric that is comfortable, durable, and suitable for your desired style. Popular options include cotton, satin, taffeta, or lace.
- Pattern: If you’re sewing your own dress, you’ll need a pattern that matches your desired style.
- Thread: Matching thread for sewing the fabric pieces together.
- Scissors: A good pair of fabric scissors.
- Pins: To hold the fabric pieces together while sewing.
- Sewing machine: If you’re sewing the dress yourself.
- Iron and ironing board: To press the seams and create a neat finish.
For the Apron:
- Fabric: Choose a fabric that is durable and easy to care for, such as cotton or linen.
- Elastic: For the waistband.
- Thread: Matching thread for sewing the apron.
- Scissors: To cut the fabric.
- Pins: To hold the fabric pieces together.
- Sewing machine: If you’re sewing the apron yourself.
The Headwear:
- Fabric: Depending on the style of headwear you choose, you may need fabric for a cap, headdress, or headband.
- Elastic: For a cap or headband.
- Wire: For a headdress.
- Decorations: Such as ribbons, flowers, or feathers.
Embellishments:
- Lace: For trim or details.
- Ribbons: For bows or sashes.
- Appliqués: For decorative designs.
- Beads or sequins: For embellishments.
- Flowers: For decorations.
- Tassels: For a bohemian touch.
Provide instructions on taking measurements for the costume’s components
Accurate measurements are crucial for ensuring a well-fitting costume. Here’s a guide to help you take the necessary measurements:
- Use a flexible measuring tape.
- Stand straight and relax your muscles.
- Take multiple measurements to ensure accuracy.
- If you’re unsure about a measurement, it’s better to err on the side of being slightly larger.
Adding embellishments
Embellishments can elevate your maid costume from ordinary to extraordinary. Here are some ideas to consider:
Other Embellishments:
- Jewelry: Wear jewelry that complements your costume, such as a necklace, earrings, or bracelet.
- Gloves: Add a pair of gloves for a more formal or vintage look.
- Garter: Wear a garter for a touch of sexiness.
Tips for Adding Embellishments:
- Consider your overall aesthetic: Make sure the embellishments you choose complement the overall style and theme of your costume.
- Less is sometimes more: Avoid overwhelming your costume with too many embellishments.
- Experiment and have fun: Try different combinations of embellishments to find the perfect look for you.
By adding thoughtful embellishments, you can create a truly unique and memorable maid costume.
Guide the reader through the process of cutting the fabric
Cutting the Fabric:
- Lay out the fabric: Spread your fabric out on a flat surface, ensuring it’s smooth and wrinkle-free.
- Pin the pattern pieces: Place the pattern pieces on the fabric, pinning them securely in place. Make sure to follow the grain lines indicated on the pattern.
- Cut the fabric: Carefully cut around the pattern pieces using a sharp pair of fabric scissors. Leave a small seam allowance (usually about 1/4 inch or 0.6 cm) around the edges.
- Label the pieces: Label each cut piece according to the pattern instructions to avoid confusion.
Sewing the Different Parts:
Sewing the Bodice:
- Pin the front and back bodice pieces together: Align the shoulder seams and pin the pieces together.
- Sew the shoulder seams: Stitch the shoulder seams using a straight stitch.
- Pin the side seams: Align the side seams and pin the pieces together.
- Sew the side seams: Stitch the side seams using a straight stitch.
- Attach the sleeves (if applicable): If your dress has sleeves, pin and sew them to the armholes.
The Skirt:
- Pin the skirt panels together: Align the side seams of the skirt panels and pin them together.
- Sew the side seams: Stitch the side seams using a straight stitch.
- Attach the waistband: Pin the waistband to the top edge of the skirt. Sew the waistband securely in place.
Attaching the Bodice to the Skirt:
- Pin the bodice to the skirt: Align the waistline of the bodice with the waistband of the skirt. Pin the pieces together.
- Sew the bodice to the skirt: Stitch the bodice to the skirt using a straight stitch.
Adding Details:
- Attach lace or trim: If you’re adding lace or trim to your dress, pin and sew it to the desired areas.
- Create a neckline: If your dress has a neckline, cut and sew the neckline according to the pattern instructions.
- Add a zipper or buttons: If you’re using a zipper or buttons to close your dress, pin and sew them in place.
Hemming the Dress:
- Fold the hem: Fold the bottom edge of your dress to your desired length and pin it in place.
- Sew the hem: Stitch the hem using a blind hem stitch for a professional finish.
Remember to follow the specific instructions provided in your chosen pattern. If you’re new to sewing, consider starting with a simpler pattern or seeking guidance from a sewing professional.
Finishing touches
Once you’ve completed the main components of your maid costume, it’s time to add the finishing touches that will bring your look together.
Hemming and Seams:
- Hemming: Ensure that the hem of your dress and apron is even and secure. Use a blind hem stitch for a professional finish.
- Seams: Check all seams to make sure they are properly sewn and pressed.
Fitting and Adjustments:
- Try on your costume: Put on your costume and make any necessary adjustments to the fit.
- Alterations: If needed, make alterations to the dress, apron, or headwear to ensure a comfortable and flattering fit.
Accessories:
- Choose the right accessories: Select accessories that complement your costume’s style and theme.
- Coordinate colors and materials: Ensure that your accessories match the colors and materials of your costume.
Hair and Makeup:
- Style your hair: Choose a hairstyle that complements your costume and headwear.
- Apply makeup: Apply makeup that enhances your features and matches your costume’s aesthetic.
Final touches:
- Check for any loose threads or buttons: Ensure that your costume is neat and tidy.
- Pack your costume: If you’re taking your costume to an event, pack it carefully to avoid wrinkles or damage.
By following these steps and paying attention to detail, you can create a stunning and polished maid costume that you’ll be proud to wear.
With a little creativity and effort, you can create a stunning maid costume that’s perfect for any occasion. Remember to have fun and experiment with different styles and accessories to find the look that’s right for you.